Multitenancy
The ConfidentialMind stack provides multitenancy to segregate users and resources within tenant boundaries. This allows organizations to maintain separate environments for different teams, departments, or clients while sharing the same platform infrastructure.
How Multitenancy Works
- Base tenant segregation: Every user is under at least one tenant
- Single active tenant: Only one tenant is active in portal UI at a time
- Deployment isolation: All deployments are under a specific tenant
- Sub-group organization: Tenants can have sub-groups for sharing deployments and structuring user separation
- Scoped visibility: You only see users/groups in the same tenant when sharing services
- Tenant administration: Tenant admins see all services in the tenant and can manage sub-groups and deployment access
User Levels
Regular Users
- Can join tenants through invitations, or be added to a tenant by a platform administrator
- Can create one personal tenant
- Can switch between tenants they belong to
- Can deploy services within their selected tenant
Tenant Administrators
- Have admin privileges within their specific tenant
- Can invite users and manage tenant membership
- Can create and manage sub-groups
- Can control service access and permissions within their tenant
- Can configure the assistant instructions Chat uses with direct models. See Assistant instructions.
System Administrators (Tenant-Admins)
- Can create and delete any tenant
- Can join or leave any tenant as an administrator
- Can add any user to any tenant, and remove any user from any tenant
- Can view system-wide tenant statistics
- Do not see or manage a tenant's services, models, RAG endpoints, agents or API keys until they join that tenant. Joining leaves a clear audit trail
Groups
Groups are sub-divisions within tenants that allow for more granular organization and access control:
- Members group: Default group containing all tenant users
- Admins group: Contains tenant administrators with elevated privileges
- Sub groups: Created by tenant administrators for organizing teams or projects
- Groups can be assigned different permission levels (view or admin) to specific services
- Users can belong to multiple groups within a tenant
- Every user sees all of the tenant's groups and who is in them; creating a group, moving members in and out, and deleting it stay with the tenant administrator
Using Multitenancy in the Platform
Joining Tenants via Invitations
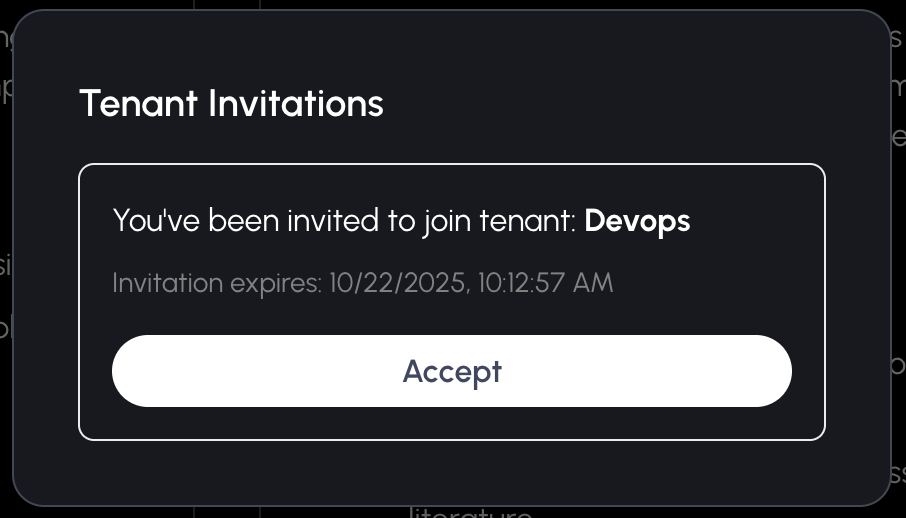
When you receive a tenant invitation:
- When logging in to the portal you will be displayed if any pending invitations exist
- Click Accept or Reject for each invitation
Creating a Personal Tenant
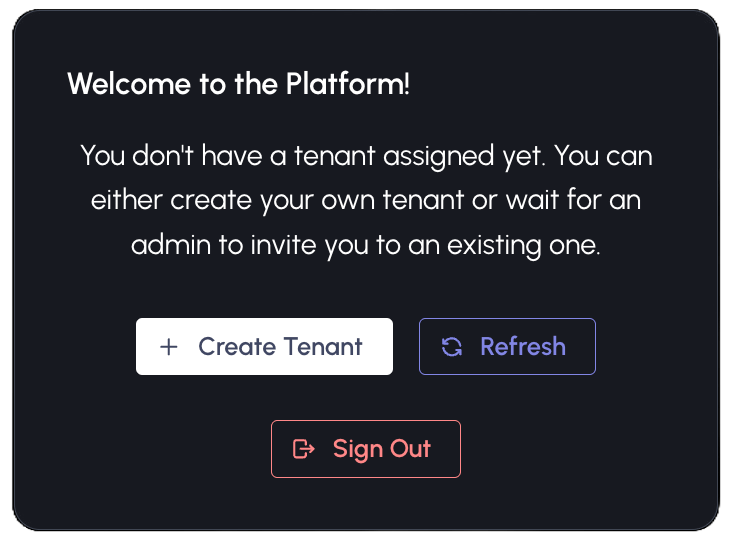
If you haven't been invited to a tenant, you can instead create your own personal tenant.
- When signing in, if you don't have a current tenant or any invitations you will see:
- Select Create tenant
- Enter a tenant name (letters, numbers and underscores only)
- Click Create
- You'll become the administrator of your personal tenant
Switching Between Tenants
If you belong to multiple tenants, you can switch between them:
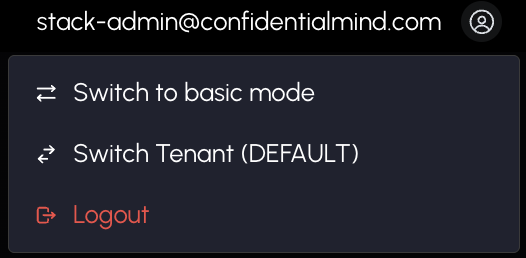
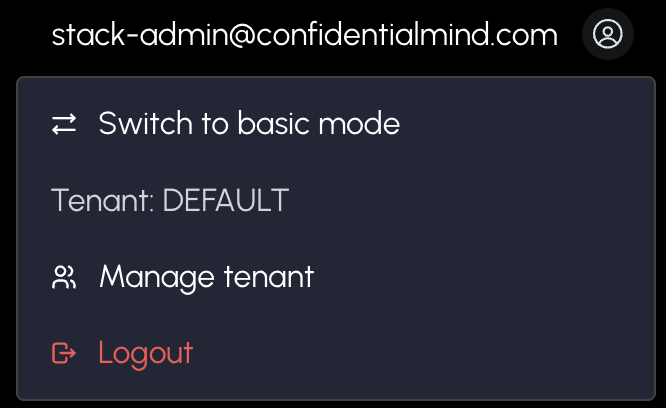
- Click your profile menu in the top right
- Select Switch tenant
- Choose your desired tenant from the list
- The platform will update to show only resources from the selected tenant, with (admin) shown for tenants where you are an admin
Service Permission Management
For any individual service, you can control who has access and at what level:
Access service permissions:
- Navigate to your specific service page
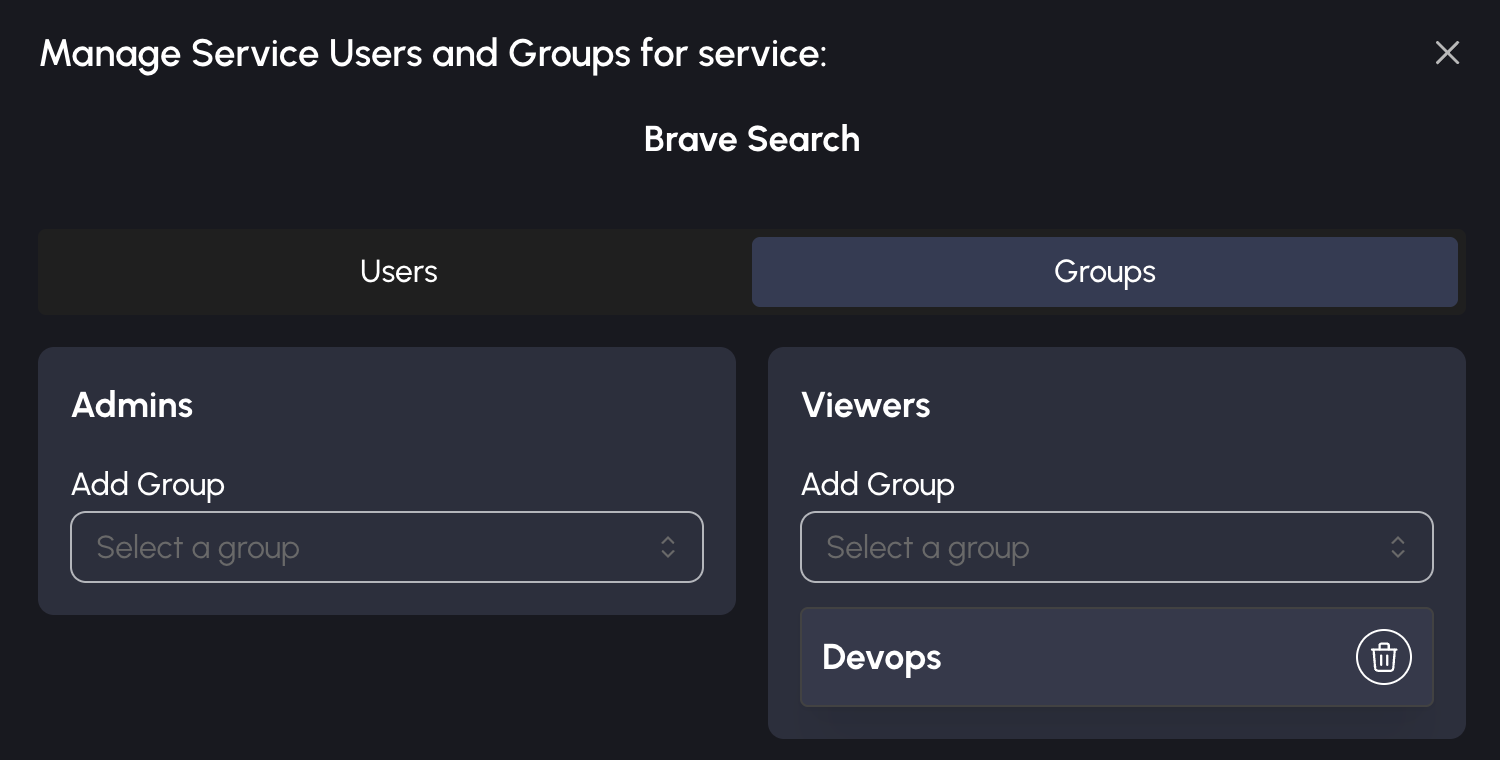
- Click on the User access tab
- Toggle between Users or Groups mode
Assign permissions to users:
- User search shows only users within your tenant
- Choose Admins or Users column and add users as needed
Assign permissions to groups:
- Group search shows all groups in your tenant
- Available options include:
- Custom groups: Your tenant's sub-groups
- Tenant Members: Gives all users in your tenant access to the service
- Tenant Admins: Gives all admins in your tenant access to the service
- Choose Admins or Viewers/Users column and add groups as needed
Permission levels:
- Admin: Full control over the service including configuration and user management
- View: Read-only access to use the service
Managing Your Tenant (Tenant Administrators)
Access tenant management by clicking Manage tenant in your profile menu when hovering the email.
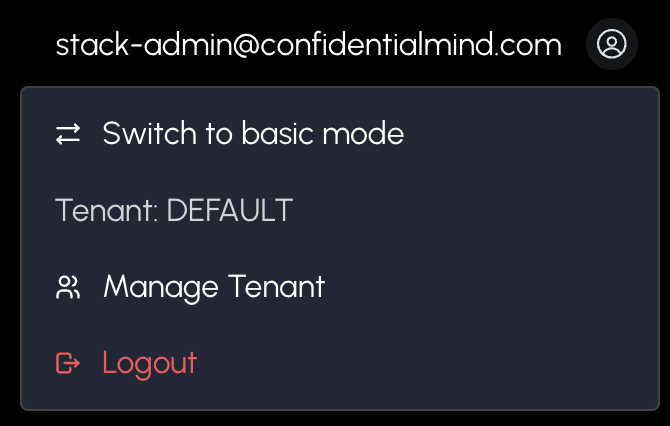
The management interface has three main sections:
Users Tab
- Search users by name, email, or group
- View admin and member user tables separately as well as all members' subgroups
- Click user groups to jump to the Groups tab
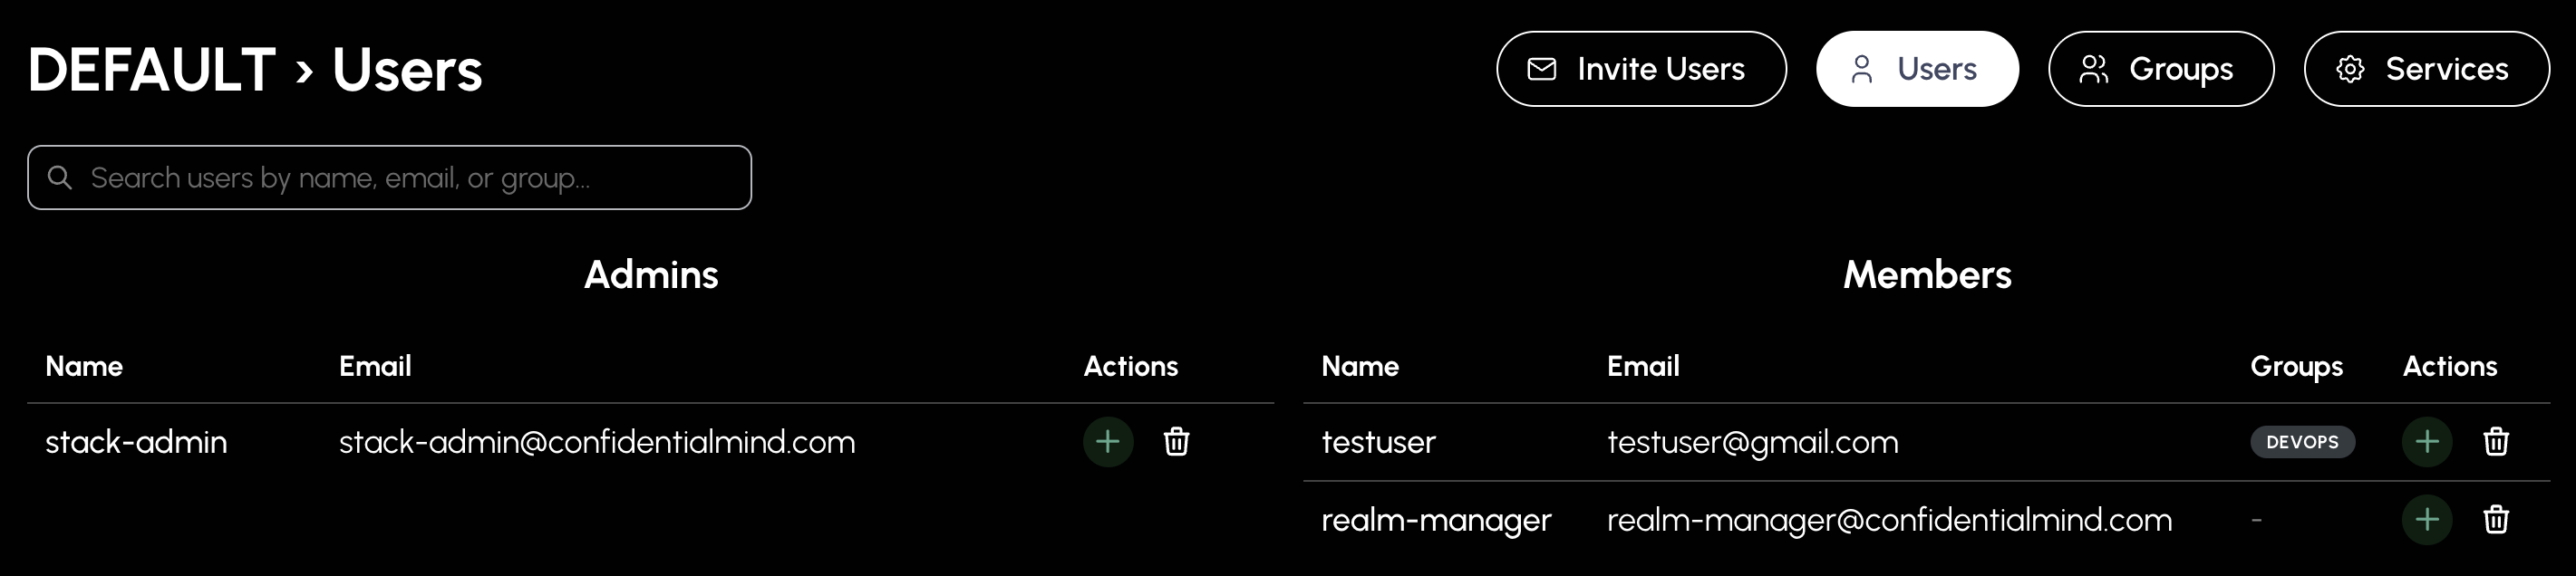
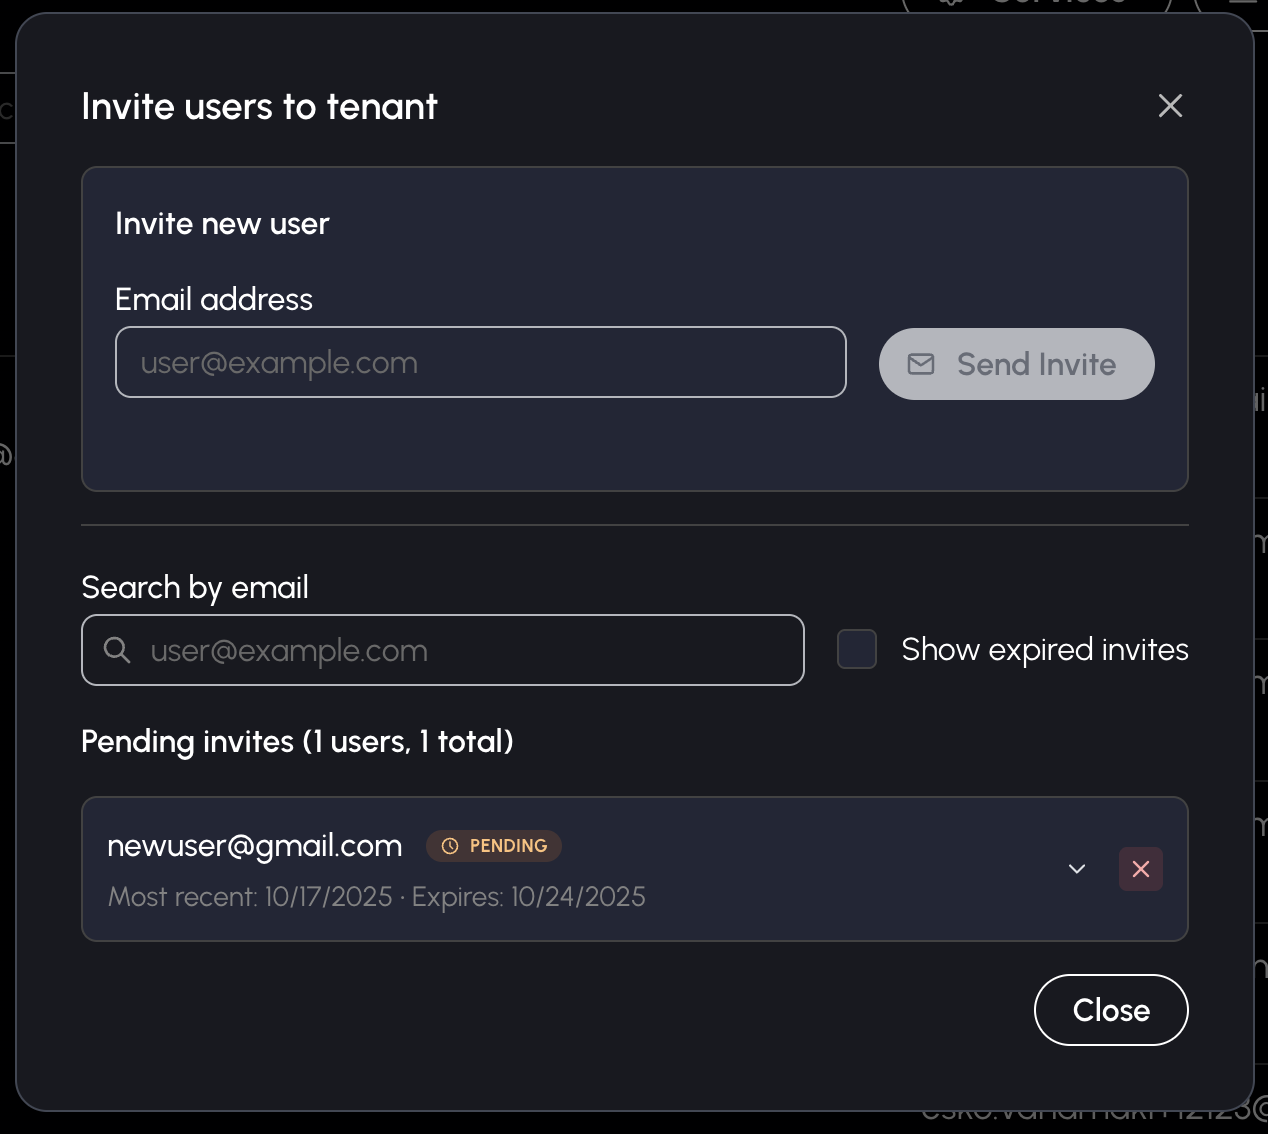
Invite new users:
- Click Invite User
- Enter the user's email address
- Click Send Invitation
- What happens after invitation:
- Existing users: Simply sign in to the portal and accept the invitation from the popup
- New users: Will receive an email to set a password for their new account, then can accept the invitation after signing in
- Track invitation status (pending, accepted, rejected)
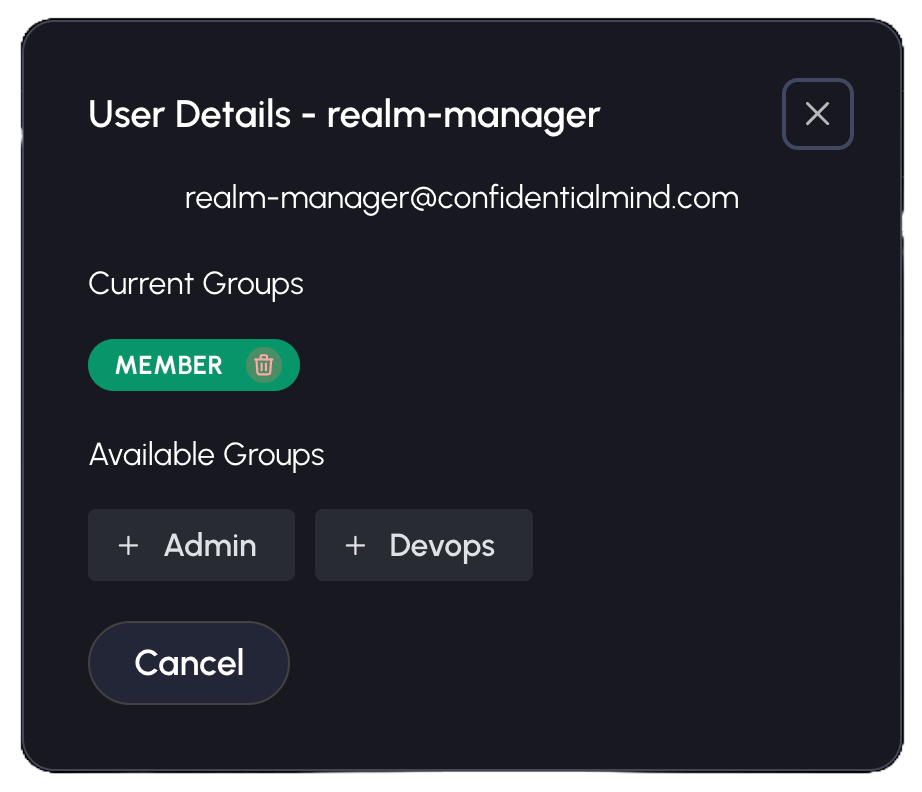
Manage individual user groups:
- View which subgroups a user belongs to in their user entry's Groups column
- Click the + icon next to a user to modify their group memberships
- Note: Removing a user from the Members group will remove them from the tenant entirely
Remove users:
- Find the user in the admin or members table
- Click the remove button
- Confirm the removal
Alternatively, remove the members group using the above method
Groups Tab
- Search groups by name
- See member counts on group cards
- Click group cards to manage members
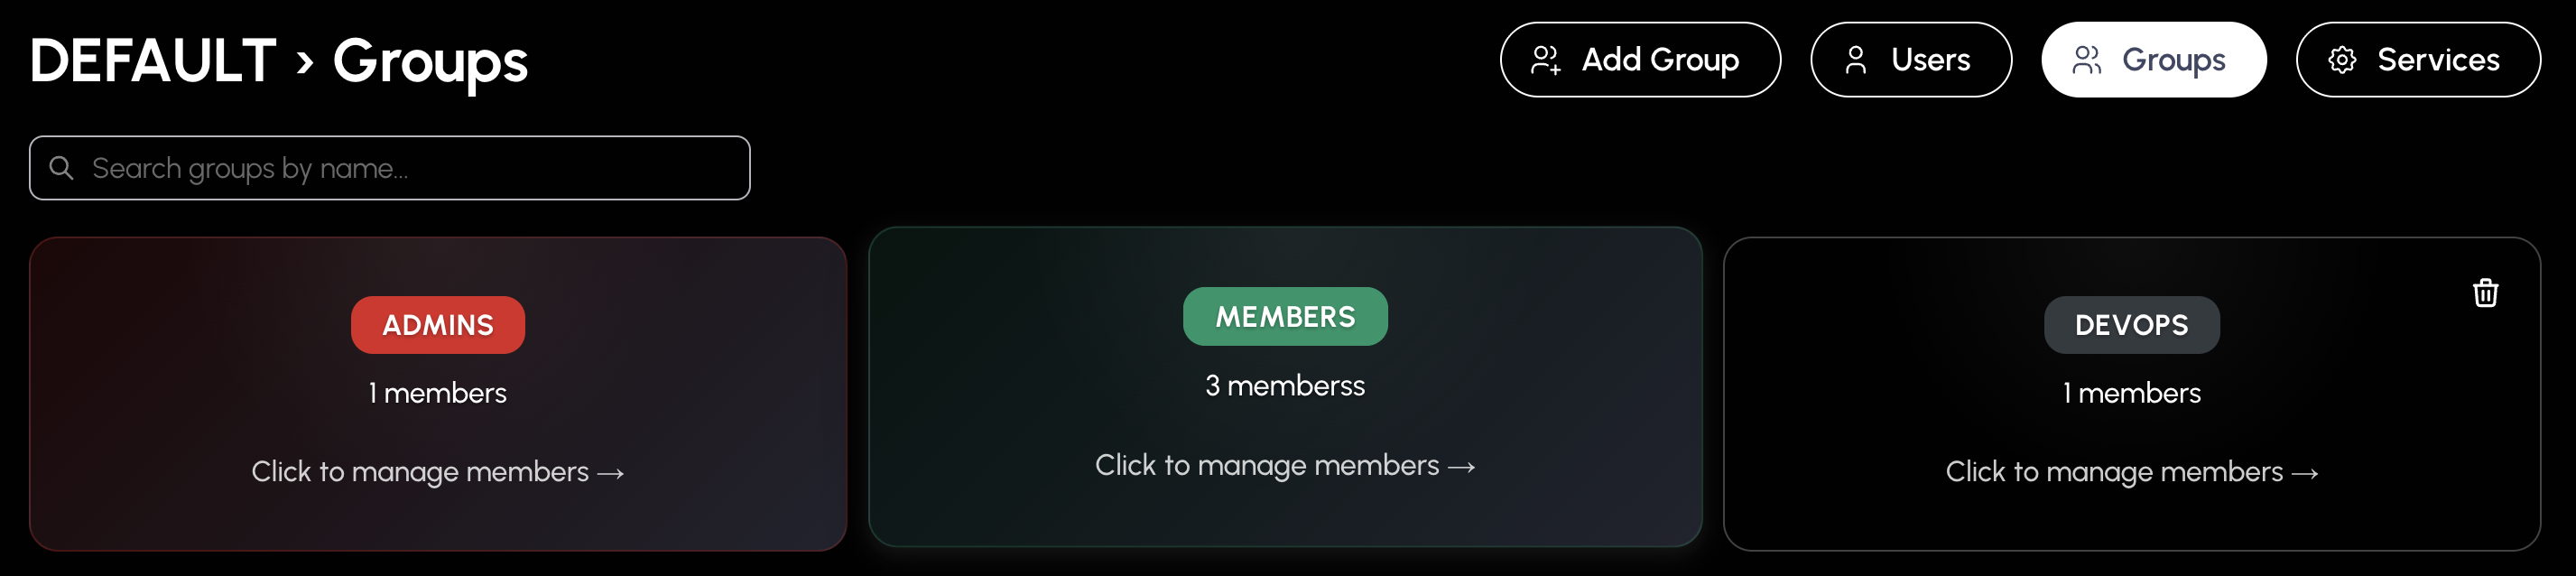
Create new groups:
- Click Create Group
- Enter group name (letters, numbers, underscores only)
- Click Create
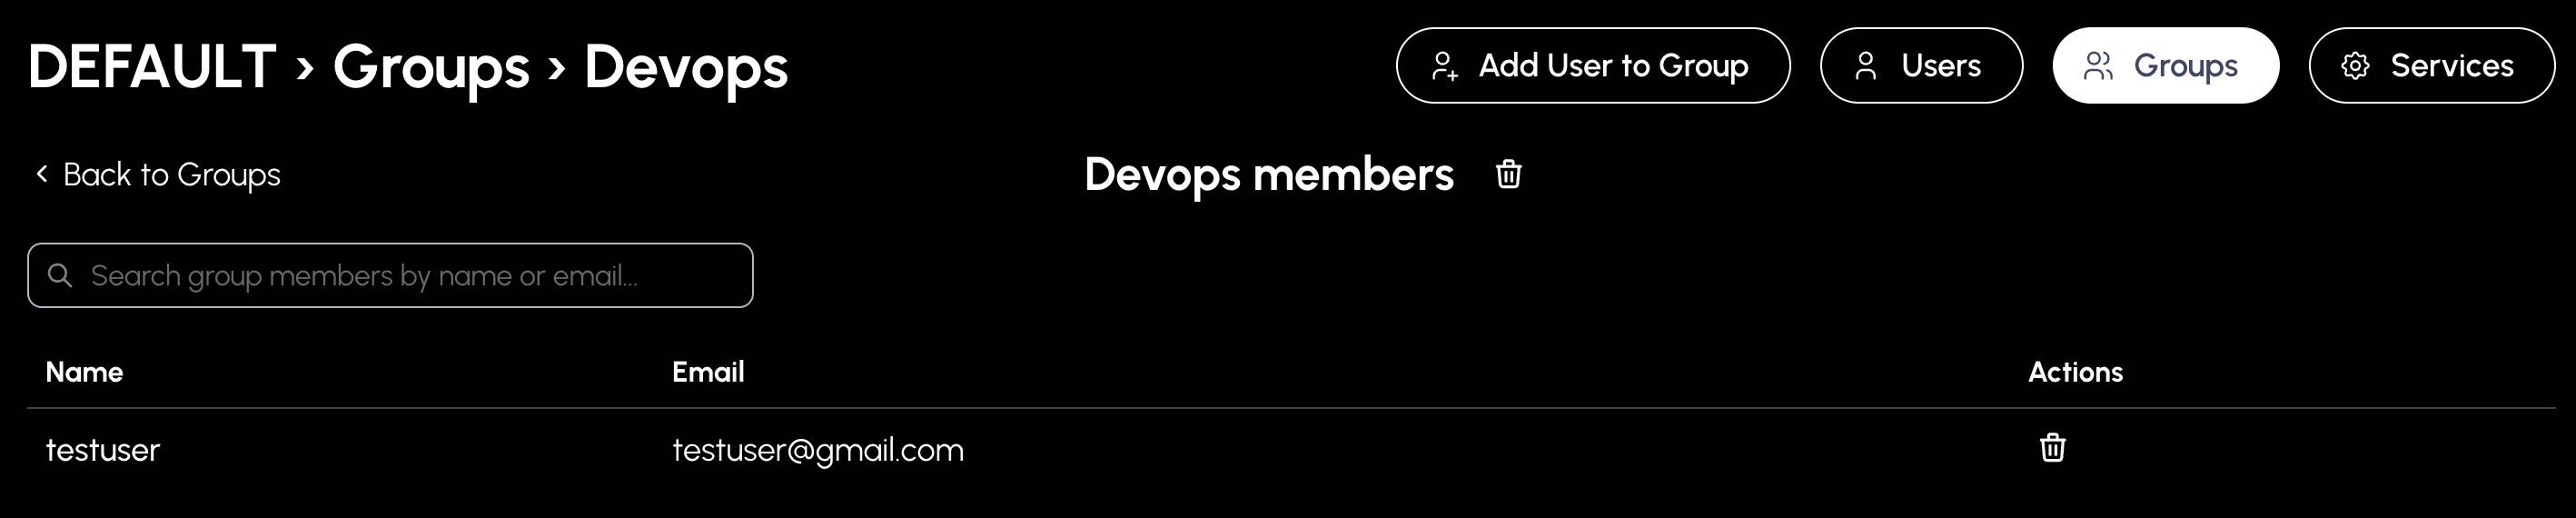
Manage group members:
- Click on a group card
- Search and add users to the group
- Remove users from the group as needed
Services Tab
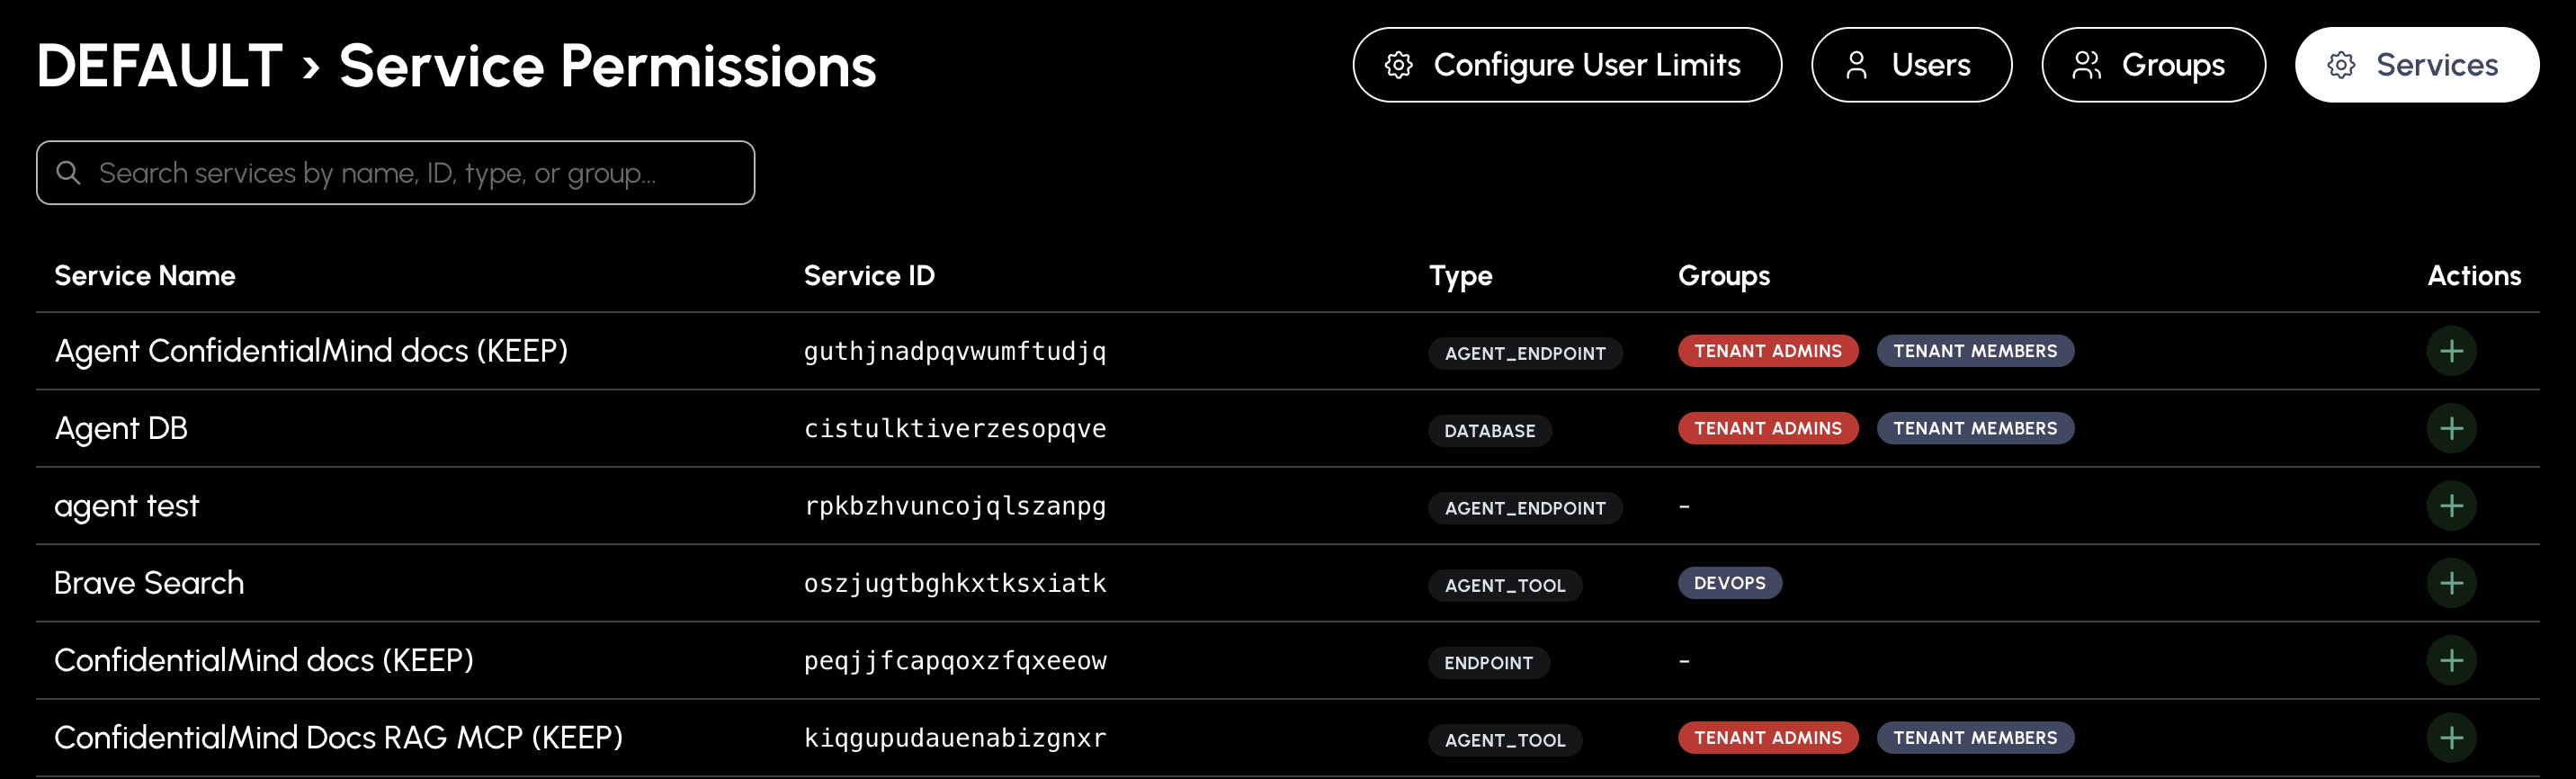
- Search services by name, ID, type, or assigned groups
- See which groups have access to each service
- Click + to manage individual service permissions for groups and users
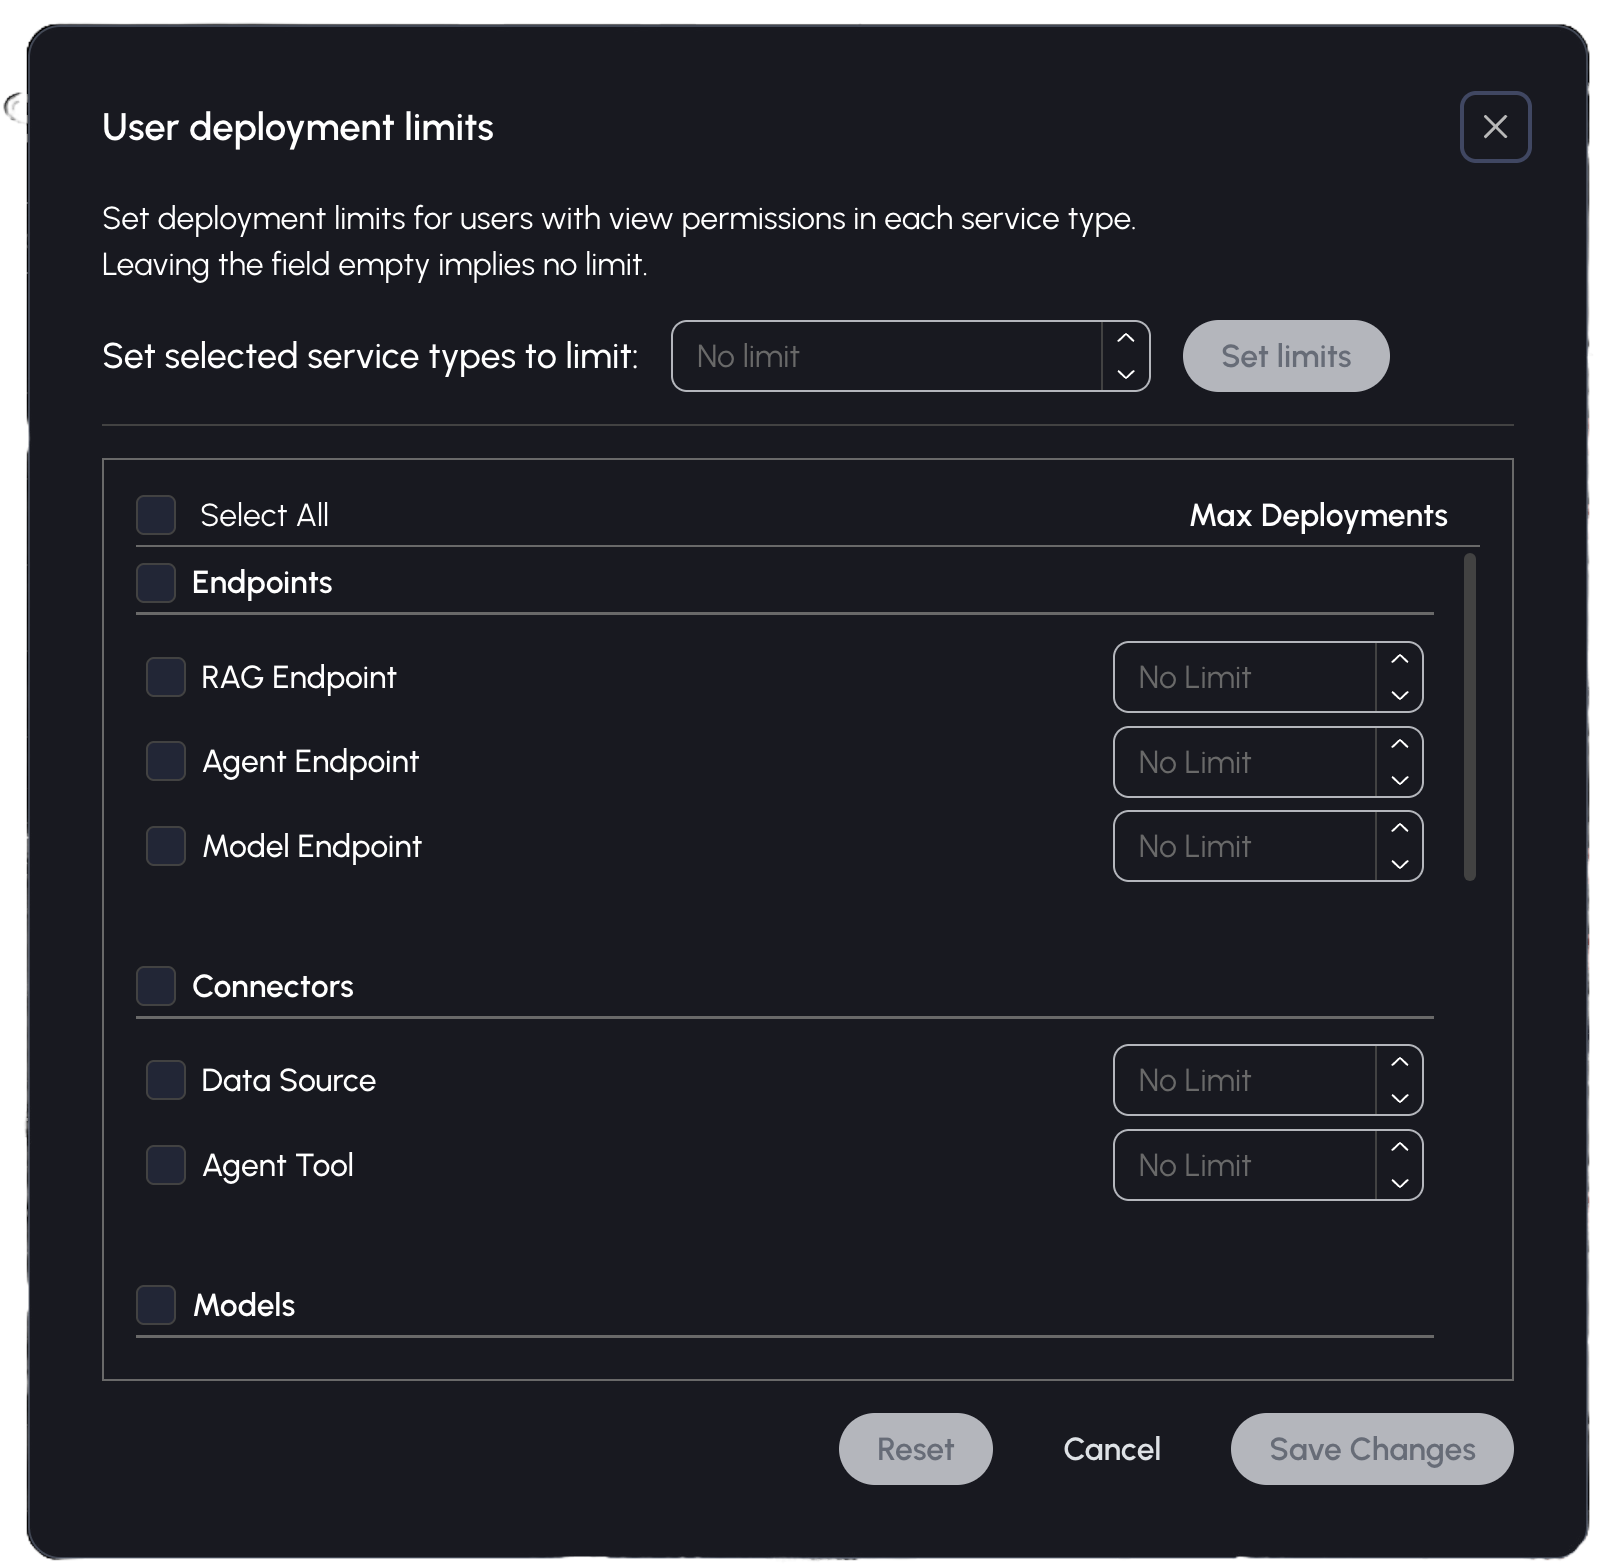
Manage user deployment limits:
- Configure limits for how many services users can deploy
- Set limits by service type as a total for all services in the tenancy
- 0 equals deployment of service type disabled for tenant members
Tenant Admin Panel (System Administrators)
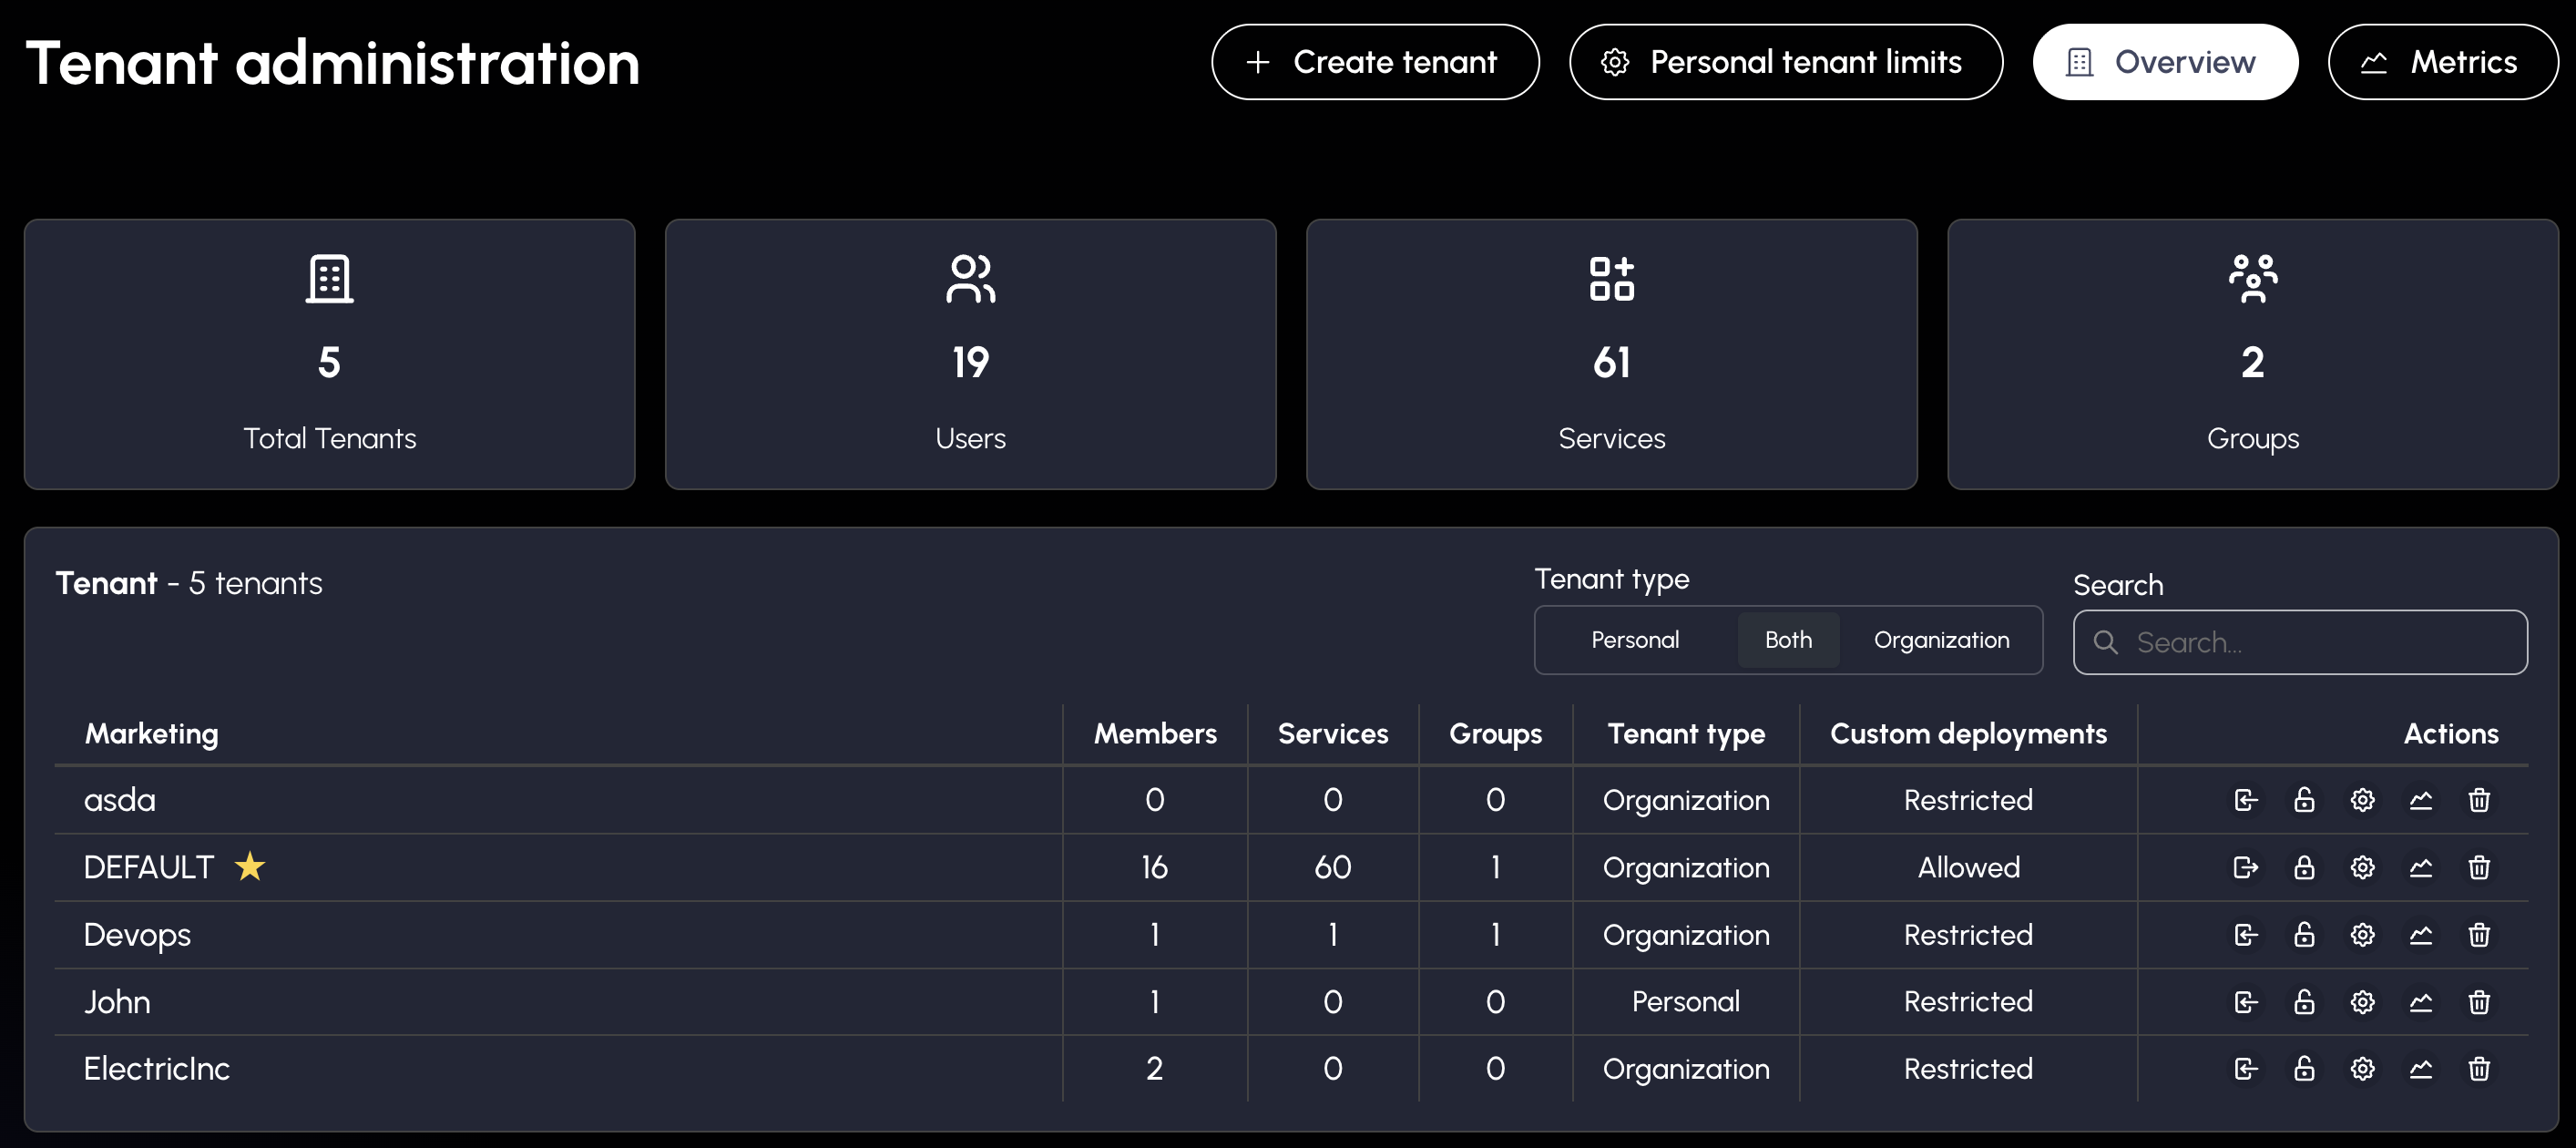
System administrators with platform admin privileges can access cross-tenant management functions to oversee all tenants in the system. The panel provides tenant statistics, creation and deletion capabilities, and the ability to join any tenant for management purposes. Joining is how you reach a tenant's own resources: its services, models, RAG endpoints, agents and API keys. A tenant you have not joined shows you none of them.
Access the tenant admin panel:
- Click your profile menu in the top right
- Select Tenant Admin Panel
Create new tenants:
- Click Create tenant
- Enter tenant name (letters, numbers, underscores only)
- Click Create
- You'll automatically become an administrator of the new tenant
Join existing tenants:
- Find the desired tenant in the list
- Click Join tenant
- You'll be added as an administrator without requiring an invitation
- Switch to the tenant context to begin management
- When done leave the tenant with Leave tenant
Leaving takes that access away again. Creating and deleting tenants, managing their members and viewing tenant statistics are unaffected either way.
Delete tenants:
- Locate the tenant you want to remove
- Click Delete tenant
- Confirm the deletion in the dialog
- All tenant resources and data will be permanently removed
Managing Users Across Tenants (Platform Administrators)
If you may manage tenants on the platform, you also get a Users page. It lists the users on the platform and the tenants each of them belongs to.
Open the page:
- Click Manage platform in the sidebar
- Select Users
The table has a Username column, an Email column and a Tenants column. If a user is in more than three tenants, the column shows the first three and how many more there are. Users who are in no tenant show a dash.
Use the search box above the table to filter the list by email or username.
Add a user to tenants:
- Find the user in the list and click the + button in their row
- Click Add to tenant
- Choose the role: Member, Editor or Owner. Owner makes the user an administrator of the tenant
- Search for tenants and tick each tenant you want to add the user to
- Click Add
The user becomes a member at once. There is no invitation and the user does not have to accept anything. Every tenant you tick in one step gets the same role. Tenants the user is already in are not offered.
Remove a user from a tenant:
- Find the user in the list and click the + button in their row
- Under Current memberships, click the remove button next to the tenant
- Confirm with Remove
The user is taken out of that tenant completely, including its groups, and loses access to the tenant's services. You do not have to be an administrator of the tenant to do this.
You need permission to manage tenants on the platform to open this page. It is the same permission as the platform Tenants page. Without it, Users is not shown in the sidebar.