Manage tenants across the platform
A tenant is an isolated workspace on the shared platform, for example one per team, department or customer, with its own members and resources. See What are tenants, users and groups? for how tenants, roles and groups work. This page covers managing tenants across the platform. To manage the members, groups and access inside one tenant, see Manage the Tenant. To accept an invitation or switch tenants as a user, see Manage your account and Your tenant.
Who manages what
- Members, Editors and Owners have a role in each tenant they belong to. An Owner administers that one tenant: its members, roles, groups and access. See Manage the Tenant and Roles in a tenant.
- Platform administrators manage tenants across the platform. They:
- create and delete any tenant
- join any tenant with the role they choose, and leave it again
- add any user to any tenant, and remove any user from any tenant
- set a storage limit for any tenant
- view platform-wide tenant statistics
- do not see or manage a tenant's services, models, RAG endpoints, agents or API keys until they join that tenant. Joining leaves a clear audit trail
You need permission to manage tenants on the platform to open the Tenants page. It is the same permission that opens the platform Users page.
Open the Tenants page
- Sign in to the CM Portal with a platform administrator account
- Click Manage platform in the sidebar
- Select Tenants
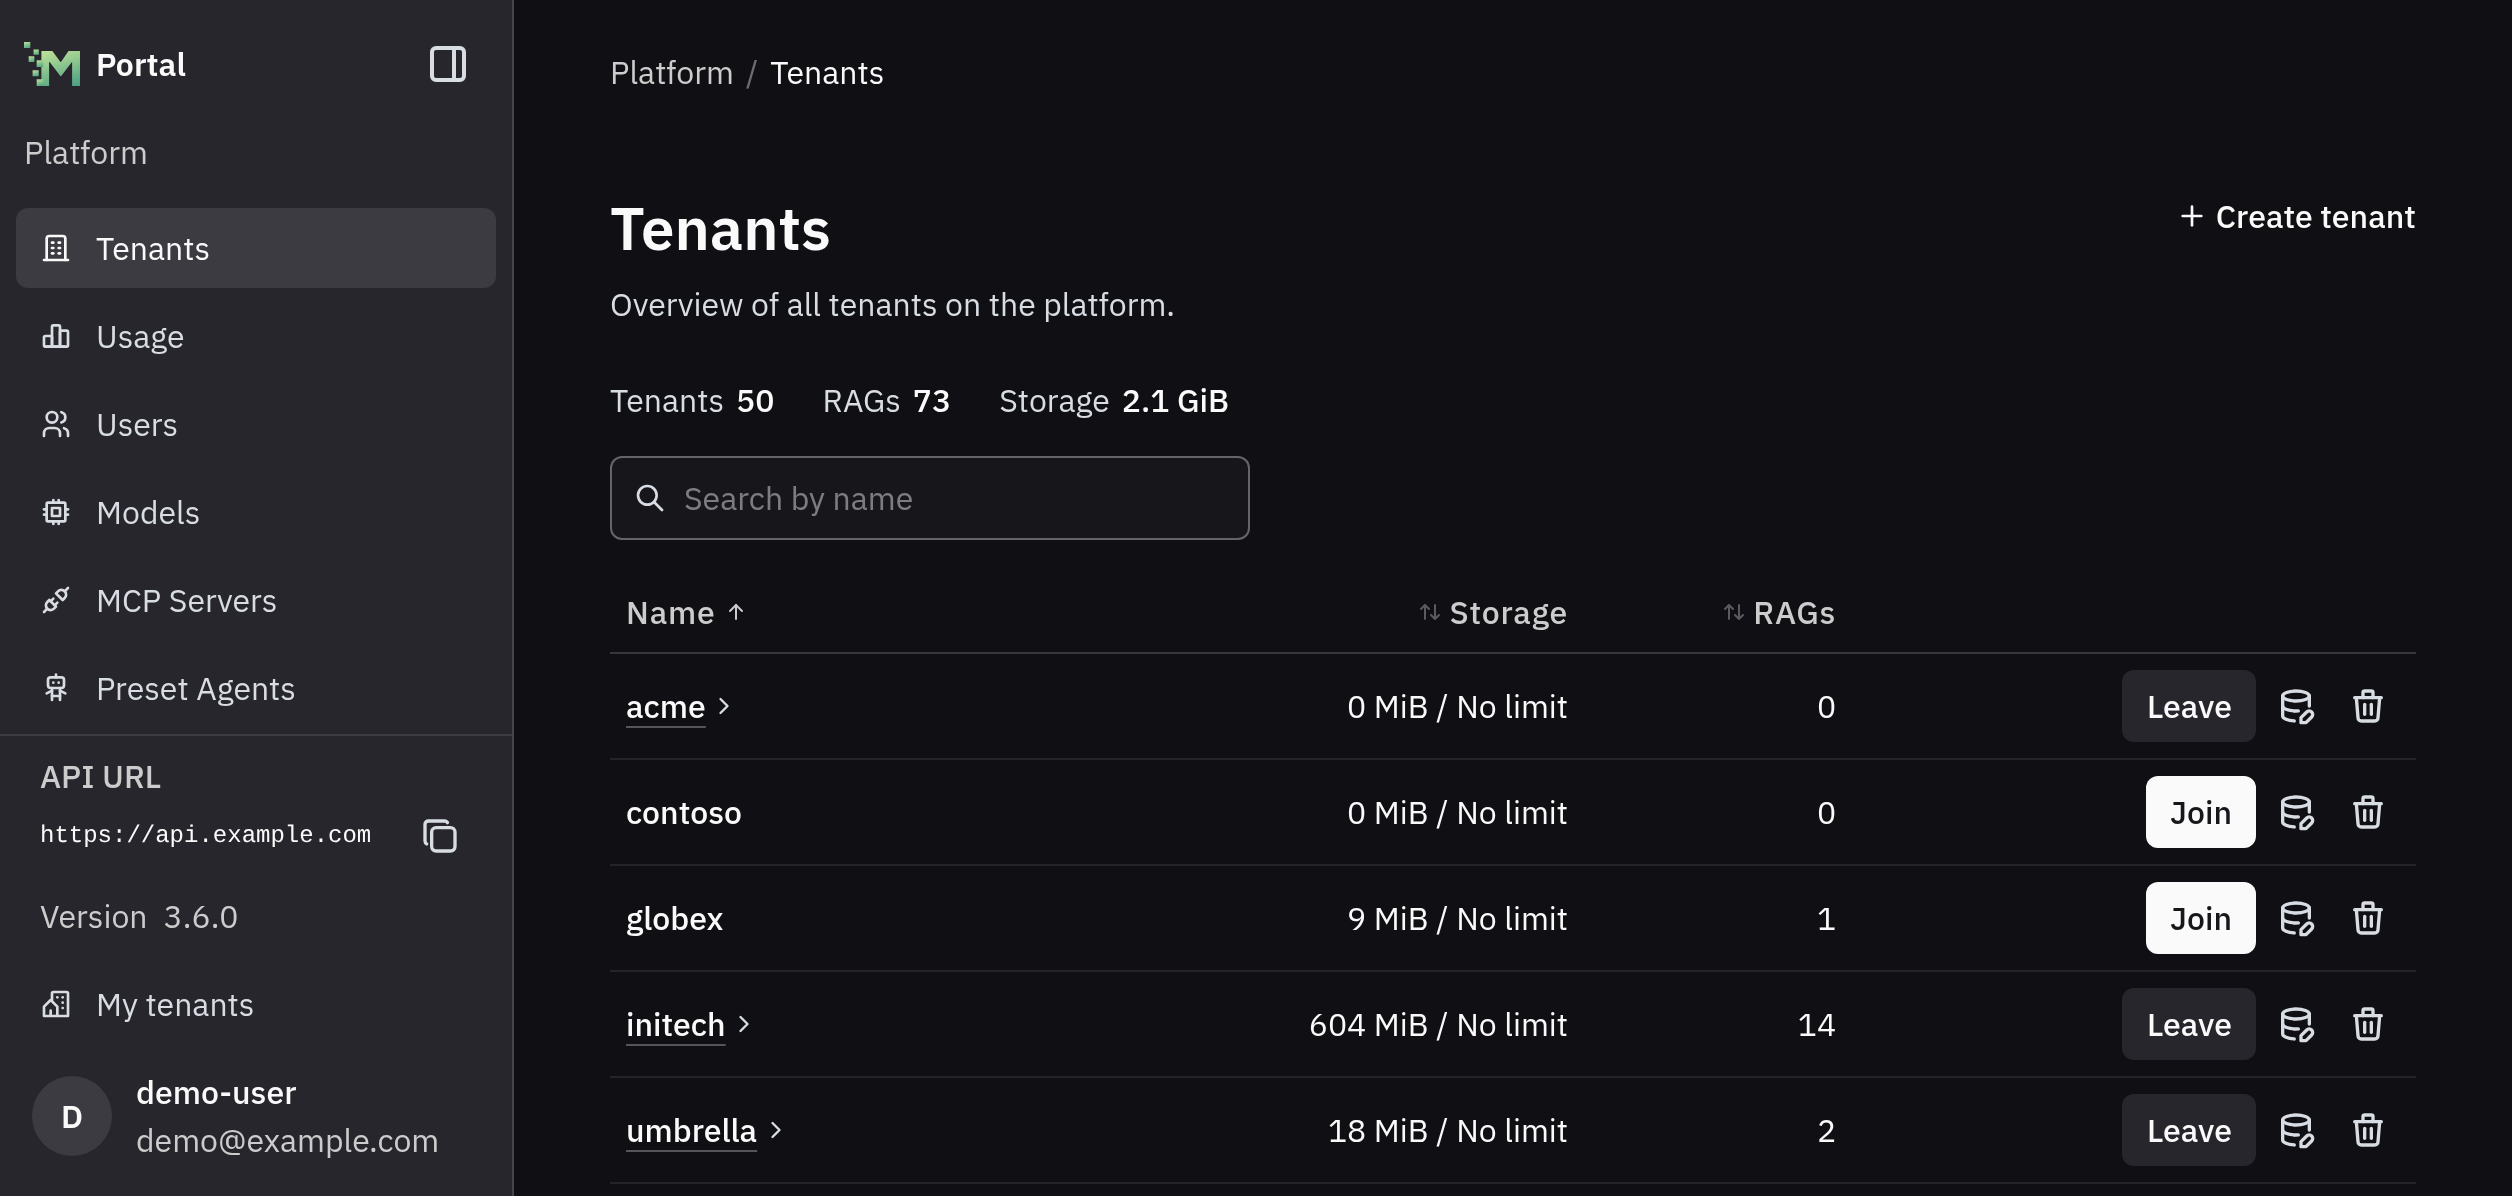
The line above the table shows platform-wide totals: the number of Tenants, and the RAGs and Storage of all tenants together.
The table lists every tenant, 25 a page, in name order. Click a column heading to sort by Name, Storage or RAGs. Use the Search by name box to filter the list.
The Storage column shows the RAG storage a tenant uses and its limit, for example 19 MiB / No limit.
Each row ends with the actions for that tenant: Join or Leave, the storage quota button and the remove button.
Create a tenant
- Click Create tenant at the top of the Tenants page
- Enter a Name, for example
acme_corp. It may contain letters, numbers and underscores only, and must be 2 to 50 characters long. These names are rejected:default,rag, and names that start withrag_, which are reserved- names made only of underscores, such as
__ - a name that matches an existing tenant's, ignoring case:
Acmeis rejected whenacmeexists
- Click Create
You return to the list and the portal says Tenant created. The new tenant has no members, not even you. To work in it, join it, or add users to it.
Join and leave a tenant
Joining is how you reach a tenant's own resources: its services, models, RAG endpoints, preset agents and API keys. A tenant you have not joined shows you none of them. You need no invitation.
Join a tenant:
- Find the tenant in the list
- Click Join
- Choose your role in the tenant: Join as Owner, Join as Editor or Join as Member. Choose Owner to administer the tenant's members, groups and access
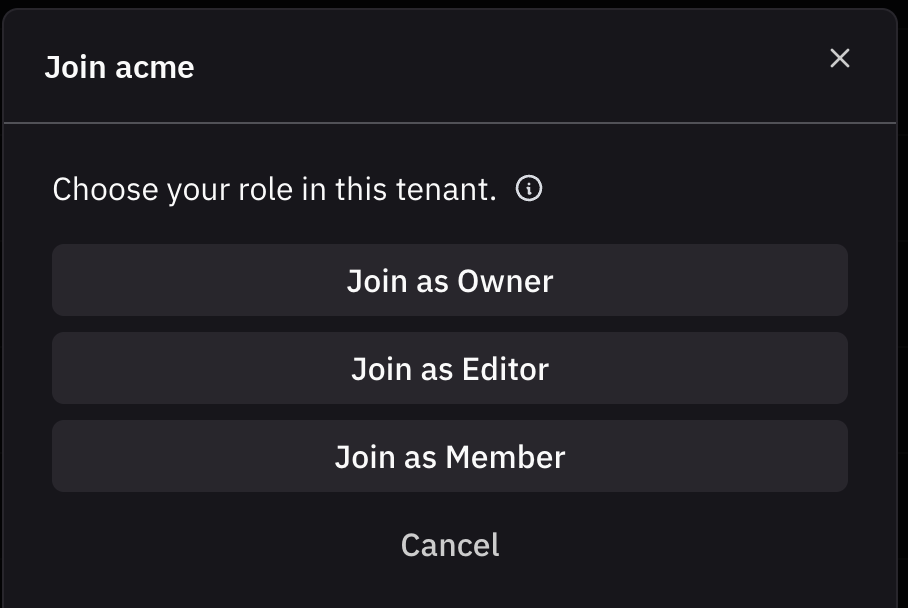
The portal says Joined and the tenant's name becomes a link. Click it to open the tenant.
Leave a tenant:
- Find the tenant in the list
- Click Leave
You leave at once, without a confirmation, and the portal says Left.
Set a storage quota
A storage quota limits how much RAG storage a tenant can use.
- Click the storage quota button in the tenant's row
- Enter a Quota in Kubernetes units, for example
10Gior500Mi. The units areKi,Mi,Gi,Ti,PiandEi - Click Save
To lift the limit, open the same dialog and click Remove limit. The Storage column then shows No limit.
Delete a tenant
The platform refuses to delete a tenant that still has RAG endpoints, external models, external MCP servers or preset agents. Join the tenant and delete them first. The error message names the ones that are left.
- Click the remove button in the tenant's row
- Type the tenant's name to confirm
- Click Remove
The portal says Tenant deleted. Pending invitations to the tenant are cancelled. Deleting a tenant cannot be undone.
Manage users across tenants
On the Users page under Manage platform, you can add any user to any tenant, change their role there and remove them from it. You don't need to be an administrator of the tenant. See Manage an account's tenants in the portal.